![]() WO 2. RICHARD LONGSTAFF
WO 2. RICHARD LONGSTAFF
Exercise Gallipoli
Serpent
1st - 6th October, 2003
![]()
|
The Dardanelles campaign of 1915 was one of the most disastrous
series of engagements of a war that was characterised by its catastrophic
battles. It became a byword for incompetent management, lost opportunities
and bad planning, matched only in waste of men and equipment by the worst
that the Western Front could offer.
Today this lonely south-eastern corner of Europe is haunted by the events of April - December 1915. To try and discover how the medical services of the time coped with the massive numbers of casualties and sick, 50 members of 2 Med Brigade set off to Turkey to explore the battlefields of the Gallipoli peninsula and to see how modern techniques would cope with a similar task today. In November 1914, fearing Russian expansionism, the Ottoman Empire allied itself to the central powers. Able to threaten British interests in general and the Persian oilfields in particular, Turkey was seen by Germany and Austria-Hungary as a useful ally in the Middle East. |
By January 1915 the war was not going well for the allies. In France and Flanders, trenches, barbed wire and machine guns blunted their offensives. If Turkey could be "knocked out of the war", the massive slaughter on the western front might somehow be avoided. The Russians would take over Constantinople and could then be supplied through a port which did not freeze in winter, British interests in the Mediterranean and the Middle East would be secure and Rumania and Bulgaria might be persuaded to enter the war on the allied side.
The genesis of the campaign was the brainchild of the British first Lord of the Admiralty, the Right Honourable Winston Churchill M.P. He initially envisaged that a purely naval force would be able to force the Dardanelles strait, anchor off Constantinople and bombard the capital into submission, thereby forcing Turkey to sue for peace.
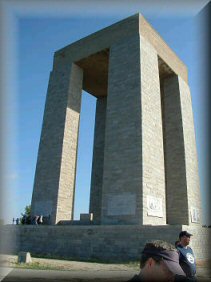
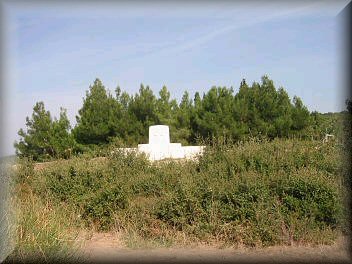
Turkish March 18 Memorial
On March 18 this was attempted by the navy but failed miserably, due to the combination of gun emplacements and sea mines that sank 3 battleships when they attempted to force the straits. The decision was taken to land a scratch force on the Gallipoli peninsula, to neutralise the Turkish Guns there so that the navy could clear the mines which had stopped them so spectacularly on the 18th and clear the way to Constantinople. The commander of this force was General Sir Ian Hamilton who had barely a month to organise his troops for the landing that was to take place on the 25th April.
The initial plan seemed to be sound. The British were to land the 29th Division on the southern tip of the peninsula at Cape Helles, the Australian and New Zealand Army Corps or ANZACs were to land further up the coast. They were included in the plan because they were present in Egypt en route to France. Both forces were to link up on the Maidos Plain and drive on to the town of Maidos, thereby cutting the peninsula in two, starving it of supplies and ammunition to the Turkish batteries which commanded the straits. This in turn would open the door to Constantinople.
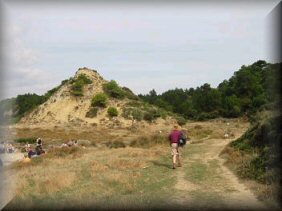
After the best part of a 24 hour journey, we found ourselves in Ecebat (or Maidos in 1915), the main town on the peninsula. Accommodation was provided by TJ`s Hostel, an ideal place to explore the area, basic but functional. After a good night's rest, we set off to explore the battlefields of 1915, first stop a 16th century castle at the entrance to the channel to enable the group to appreciate the history of the area and a strategic introduction to the campaign.
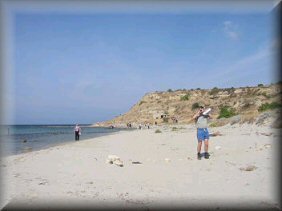
Cape Helles, the British sector in the south, is characterised by deceptively flat looking land interspersed with various gullies and watercourses. After the rocky cliffs adjoining most of the 5 landing beaches (X, Y, S, V and W, ) the ground appears to flatten, giving an almost saucer like appearance to the area, the cliffs by the sea being higher than the central area. Other notable features are the village of Krithia located about 4 miles inland in a central location, and a low hill which dominates the whole sector named Achi Baba, about 1 ½ miles northeast of this settlement. A prominent gully about 3 miles long is located on the left hand side of the area, starting at the sea about 2 miles from Cape Helles.
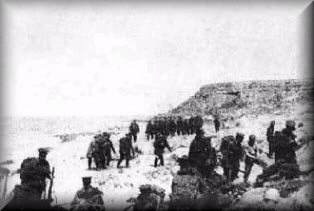
On the morning of the 25th April the landings at V and W beaches were opposed by just 1 Turkish company. At W Beach 2000 men were to land from the converted Collier ship the "River Clyde" and surprise the defenders by exiting the ship through specially cut holes in the side. As she grounded, the men of the Hampshires and Dublin and Munster Fusiliers poured out of the hull but came under accurate machine gun and pom-pom fire and were cut to pieces, dying in their hundreds. It was said that for 50 yards out to sea the water was stained red with their blood. The fallen eventually blocked the gangways so that those remaining inside the ship could not leave. Those men that did survive and got onto the beach took shelter underneath a low sandbank which is still there today, as is the jetty which eventually connected the River Clyde to the beach. The area today is instantly recognisable from photographs of 1915, the ruined fort of Seddulbahir being particularly atmospheric.

Cape Helles and Memorial from V Beach Turkish Machine-gun
positions
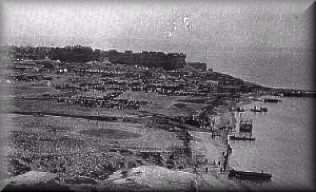
As the landing tows approached the shore at W beach, the defenders opened up with a murderous fire, progress being hampered by beach obstacles and barbed wire strung up underneath the water. The British took hundreds of casualties before the bluffs on the left of the beach were outflanked. It was said that the Lancashire Fusiliers won "6 VCs before breakfast" here, all awarded by ballot as there were too many acts of individual bravery to take into account. For the rest of the campaign this beach became the main administration area for the British at Helles, remnants of piers nearby testifying to this period of the campaign. Many medical units were located on the cliffs nearby, enabling medical care to be given to the wounded before they were evacuated to Hospital ships offshore.
W Beach
The memorial at Cape Helles commemorates those of the British forces who have no known grave on the peninsula. It is an imposing monument, from its base can be seen the low hill of Achi Baba and the village of Krithia which were British objectives on the first day, but were never captured.
|
|
|
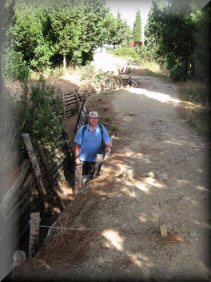
Our final trip of the day was to Gully Ravine, a (mostly) dry watercourse which ran up to the front line for about 3 miles and provided some protection to the troops going to and from the front line. Again, many medical units were located here, mostly Dressing stations and RAPs. Some of us were lucky enough to discover the remnants of medical bottles, others ammunition. All along the ravine old trenches and the remnants of dug-outs could be made out, a tangible link to the events which happened here nearly 90 years ago.
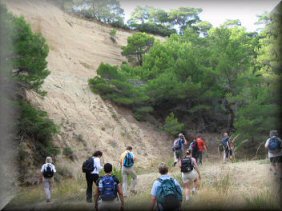
Left - Entrance to Gulley Ravine. Right - Gully
Ravine.
To most people, the word Gallipoli sums up images of Australian soldiers in crowded trenches, indeed most of the tourist industry in the area today seems centred on the ANZAC contribution to the campaign. No trip to the peninsula would be complete without a detailed study of this sector, so the "Ex Gallipoli Serpent" participants found themselves examining the ground here over a period of two days.
ANZAC Cove
At 0400 hours on the 25th April, the men of the ANZAC found themselves rowing toward a forbidding and ominous coastline. Little did they know that the event that they were to take part in would become the defining moment in their national consciousness.
As the dawn broke that morning, the ANZACs realised that they had landed in the wrong place. The terrain here consisted of steep foothills and deep gullies, all gradually forming into a ridge known as Sari Bair and then up to a 900 Metre peak called Chunuk Bair. Although they had landed with minimal casualties, the enemy was now starting to engage them heavily and they were unable to withdraw and regroup. The Australians and New Zealanders were to remain stuck here for another 9 months. The original landing beach became an important administration area, today known as ANZAC Cove, but in 1915 known as The Beach. Always under observation by the Turks from a headland to the south, The Beach was subject to constant shellfire, but due to the nature of the terrain ashore it was considered one of the less dangerous areas of ANZAC. All troops and equipment going in and out of the sector had to pass through here which meant that at all times of the day and night The Beach was a very busy place. Col. Best, one of our guest speakers, gave a thought-provoking talk on the difficulties faced by the medical services here, emphasising the problems with the collection and evacuation of casualties.
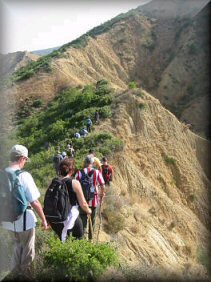
| Following a fascinating walk along the beach we moved off in small groups with our guest speakers. Our route moved over places such as Plugges Plateau, Rest Gully, Shrapnel valley and Monash Gully. This last feature was the main route the ANZACs took inland up to the front line and was under constant observation and sniper fire from the Turks on higher ground which overlooks the area. Above us famous features such as Quinn's Post and Lone Pine frowned down on us - it was said that the troops moving up into the line here would look up at such places as a normal man might regard a haunted house. |
|
|
As the group reached the site of the old front line, it became apparent how tenuous the position here was. Turkish and ANZAC trenches were only 10 yards apart in places, with some Australian positions only yards from a steep drop behind them. A large proportion of the line and supporting area was overlooked by Turkish positions, the whole area must have been an extremely difficult place to survive in, let alone mount an attack from. |
As at the other sectors at Gallipoli, disease was the number one cause of casualties during the campaign. Thousands of unburied corpses between the opposing trench lines meant that no mans land quickly became a breeding area for flies which then spread dysentery amongst the combatants. Up to 80% of the troops at ANZAC had the condition in the summer months, lack of adequate water supplies adding to their misery. Proper washing facilities were non-existent; bathing in a pint of water once a month became a luxury.
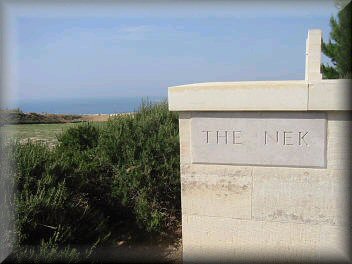
From Walker's ridge, we moved into a famous position. Known as The Nek, due to its topography, it is a narrow strip of land which connects the hills of Russell's Top and Baby 700 which was in Turkish hands throughout the campaign. Characterised by a steep drop on either side, this saddle of land was the scene of a charge by the Australian 3rd Light Horse, as immortalised in the film Gallipoli.

Left: ANZAC trenches at Nek Right: Turkish front line at
Memorial position, from ANZAC assault trench
| Designed as part of the great August offensive, the attack at the
Nek was to divert attention away from the complicated attack which was to
take place on the Turkish right flank. In 4 assault waves, the Australians
were mown down at point blank range by at least 3 machine guns on the high
ground which overlooked the position. Of the 450 men who attacked on that
fateful August morning here, 435 of them became casualties, over 300 of them
are buried at the cemetery located in no mans land between the front lines.
|
 |
|
Covering an area of approximately 2 tennis courts, the original
Australian assault trenches are still here adding an almost eerie atmosphere
to this area. Dr Chris Pugsley, our New Zealand guide from RMAS Sandhurst
gave an emotive talk about the action, which summed up the futility of the
campaign in particular and that of the First World War in general.
From the Nek we moved along the whole of the old front line at ANZAC, now easily navigable by the road which runs along the approximate position of no mans land. In the scrub by the side of the road remnants of trenches and mine workings can be entered and explored, a tangible link to the events of 1915. |
| Our walk finished at the Australian Cemetery and Memorial at Lone Pine. Heavily fought over throughout the campaign and captured in the August offensive, it was described in 1915 as "Of all the bastards of places, this is the greatest bastard of them all." The front lines were so close together here, recovery of the dead was impossible, the stench of death and destruction hung over this place, searing the memory of it into every man who served here. Ten VCs were won by the ANZACs during the campaign, seven of them for actions at Lone Pine. It is a fitting place for the impressive memorial to the 4000 plus Australians who fell in this area and have no known grave. |
|
On a personal level I desperately wanted to visit the memorial as I share my name with an Australian Soldier whose name is on the memorial. I was able to find him and place a cross of remembrance nearby, a very moving moment.

In August 1915 an audacious attempt was made to break the deadlock at Gallipoli. The British were to land at Suvla bay to the north of ANZAC and open up a new front, the ANZACs themselves were to execute a bold plan to breakout on the left flank of their sector. The next two days were to be spent examining both these aspects of the August offensive.
Col. Rowan gave us an introductory brief on one of the cemeteries on North Beach and pointed out the many distinctive features associated with this phase of the fighting. With such names as Baby 700, Rhododendron Spur and Battleship Hill, the nature of the ground in this area played havoc with the complicated ANZAC assault. Being in the right place at the right time was critical to the success of the operation, unfortunately when the time came to put the plan into action the attacking units became intermingled and lost. Men of the Wellington Bn., New Zealand Infantry Brigade, did capture the summit for a short time but were driven off by a massive counter-attack soon after.
As we set off up Rhododendron Spur that morning, it quickly became apparent why the assault failed. We were walking the route with no equipment in daylight, we had maps and full water bottles and were not suffering from dysentery. The ground is very difficult to navigate, characterised by steep ridges and deep ravines, no wonder that over laden sick men without proper maps in the dark became intermingled and lost. As we reached the summit, it became apparent that the men who managed to take and hold this hill for a few hours in 1915 were a special breed, enduring Turkish artillery fire and holding off determined Turkish assaults. The New Zealand memorial stands proud at the top, along with an imposing statue of Kemal Attaturk (the Turkish President who made his name at Gallipoli) who was the local Turkish commander here during the battle.

left to right - Rhododendron Spur : New Zealand and Attaturk Memorials
on summit of Chunuk Bair :
Author in Turkish trenches on summit of Chunuk Bair
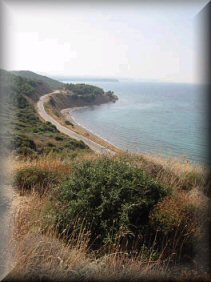
The landings at Suvla were intended to provide the allies with an opportunity to break the impasse at Helles and ANZAC. The British were to land, quickly seize the heights which formed a semi-circle around the area of Suvla Bay and then in conjunction with the offensive at ANZAC link up with the attackers there and drive the Turks off the summit of Chunuk Bair. Unfortunately, as is so common when telling the story of the Gallipoli campaign, this was not how it happened. The British did indeed land at Suvla as planned, but that was all they did, loosing valuble time by waiting to get all their forces and equipment ashore before they attacked. No serious attempt was made to take the hills around the bay, the positions on which were by now being heavily reinforced by the Turks who could immediately see what the allies were trying to do. The British commander at Suvla waited five days until all his forces were ashore before attacking the heights, by which time it was much too late. Unable to break out, Suvla became just another area where lives were squandered by the unthinking and uncaring high command. Penned in on all three sectors at Gallipoli, it was obvious to the allies that the Suvla debacle was the last straw. The decision was taken in October to evacuate the peninsula as soon as possible. The most successful and well planned phase of the campaign, not a single life was lost during the evacuation which was completed by early January 1916, much to the surprise of the Turks.
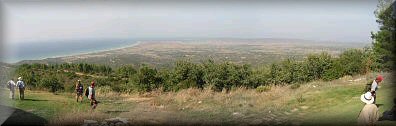
Suvla froom summit of Chunuk Bair
To get the best view of the Suvla sector we walked along the Kiritch Tepe ridge, the northernmost line of hills which form the semi-circle around the bay. Again, many signs of the fighting in this area can be found, ranging from sangars and trench lines to shrapnel, discarded ammunition, the ubiquitous shards of rum jars, even an 18 pounder shell!!
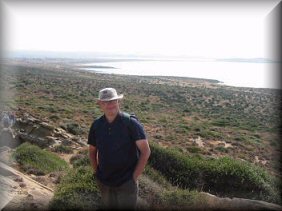
The Author at Suvla
We were coming to the end of our walk along the ridge near the site of a Turkish medical facility, when we were greeted by the saddest sight during our time in Turkey. Probably uncovered by individuals looking for souvenirs and bleached white by the sun were the scattered bones of long dead soldiers. To actually see these pathetic remains was a sobering experience, bringing home the waste and brutality of war.
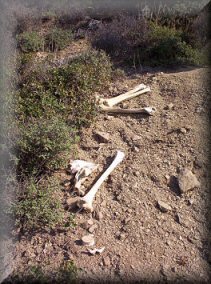
Site of Turkish Aid Post, Suvla
Our final act was to view the various sectors from the sea. All the main ground features can be easily seen at a distance making everything looks so simple. It is only by getting closer and actually walking the ground that the numerous difficulties faced by the combatants become apparent. The old maxim "time spent in recognisance is seldom wasted" springs to mind, one of the many lessons learned and reinforced on the exercise. With ranks ranging from Private to Brigadier, all the participants of "Ex Gallipoli Serpent" took something away with them from one of the better examples in military history of "how not to do things". The whole experience has been a valuable and effective way of understanding of how conflict in the past can enable us to conduct operations with greater success in the future.
click here
for a direct email link to the author of this article, email Richard Longstaff
![]()
 Copyright © WO 2. Richard Longstaff,
February, 2004.
Copyright © WO 2. Richard Longstaff,
February, 2004.
Return to the Hellfire Corner Contents Section


